
* Canning Tomato Juice *
Why I can my own tomato juice
I still remember the first time I was off on my own and wanted to make chili. I didn’t have any home-canned tomato juice, so I went and bought tomato juice. I will NEVER make that mistake again! It didn’t taste right, it didn’t look right, it was just ALL WRONG.
Once I had some land of my own, I planted tomatoes. My first year gardening was challenging–I didn’t know what I was doing. I planted tomatoes 3 times that year. (But that’s a garden fail I’ll get into another time.) I thought tomatoes, were tomatoes. I just wanted to can tomato juice. Who knew that different varieties tasted different? Right?? Such a newbie mistake on my part!!
I was ignorant and so excited! I opened my canned juice to make chili and…it didn’t taste like how I remembered. I thought, “What has gone wrong here?” I learned that if I wanted to make tomato juice taste like it did growing up, I needed to plant the varieties Mom does. So, now no matter what other varieties I might try, I will always, ALWAYS plant Better Boy and Roma–so the tomato juice will taste like Mom’s.
Canning Safety
When you do any type of canning, it is important to use the proper techniques and the right equipment.
Botulism, clostridium botulinum, is found in soil. It can survive and grow, creating a toxin with incorrect canning. This toxin can affect the nerves, cause paralysis, and even death. So, it is necessary to follow the correct guidelines laid out by the National Center for Home Food Preservation and Center for Disease Control and Prevention. For greater detail on proper canning techniques, check out How to Preserve Food Safely.
Even though I grew up helping can tomatoes, I used to be really nervous when I first started canning my own tomatoes. But, after learning the proper techniques, canning became easy!
To do water bath canning, you MUST have high acidic foods to kill the bacteria. HIGH acid foods have a pH value LOWER than 4.6 and can be processed by using the water bath method. Tomatoes live right on the edge of the acidity requirements. It is easy to get them at the proper pH, by lowering it to below 4.6 with lemon juice.
Equipment
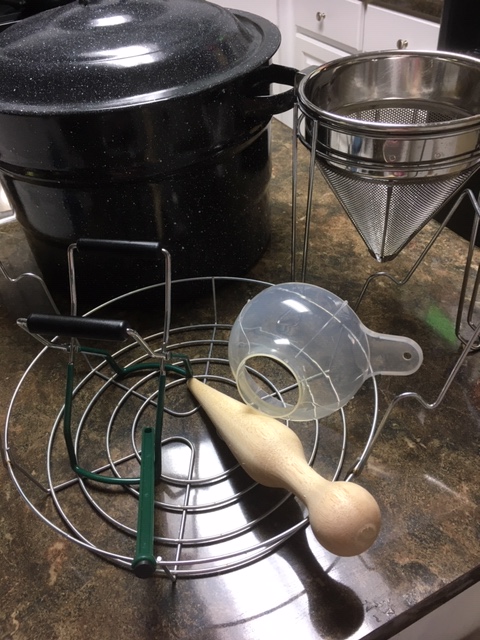
- 21 qt Granite ware with lid
jar rack - Canning tongs (tongs made for lifting jars)
- Wide mouth funnel
- Magnetic lid lifter
- Fine mesh sieve and stand
- Wooden pestle
- Pint or Quart jars
- Lids
- Rings
- Wooden cutting board(s)
- Large mixing bowl
- 1 VERY large pan or several smaller ones
- 2nd large pan
Ingredients
- Ripe tomatoes of your choice
- 100% Lemon juice
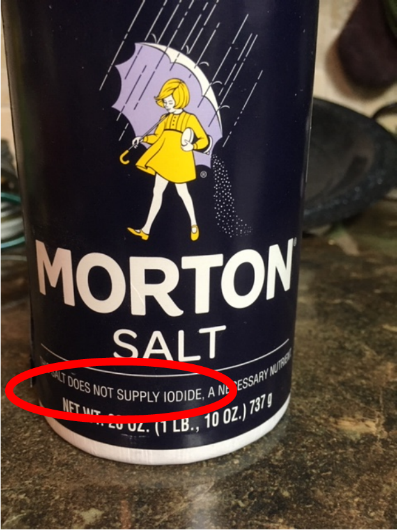
- Canning salt (no iodine)
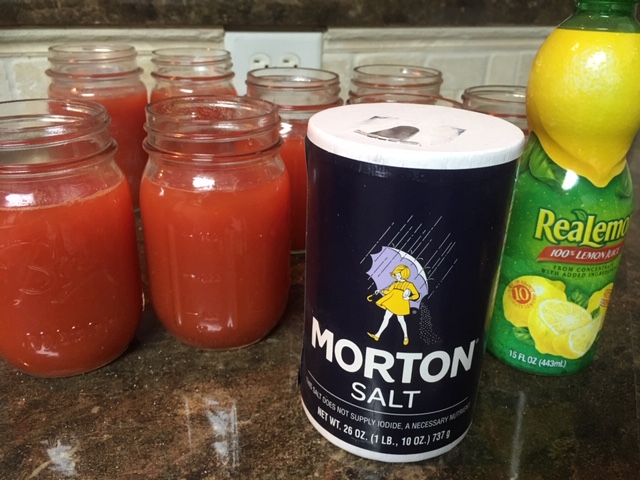
This last one is VERY IMPORTANT. You MUST use canning salt (no iodine). Salt that contains iodine can lead to spoilage. Canning salt is available at any grocery store I’ve ever shopped and the cost has always been the same as regular salt.
Step 1 * Gather the tomatoes
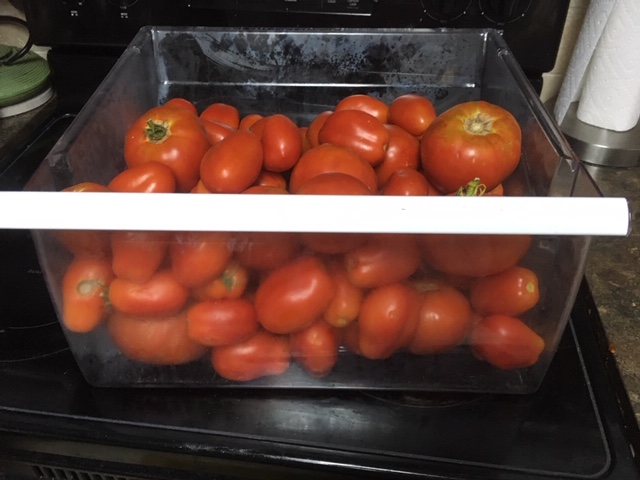
I know I have enough tomatoes to can when the bottom drawer in the refrigerator can’t hold anymore.
I place the huge, very large pot on the stove and heat it on medium. (This pot, once full, will hold enough tomatoes for 16 pt jars or 8 qt jars.) Add a little water to the pan to keep the tomatoes from scorching. If you don’t have this large of a pan, you can in batches.
I also like to start heating up the water in the granite ware at this time. It’s a lot of water and it takes a long time for it to boil.
Step 2 * Simmer to release the juice
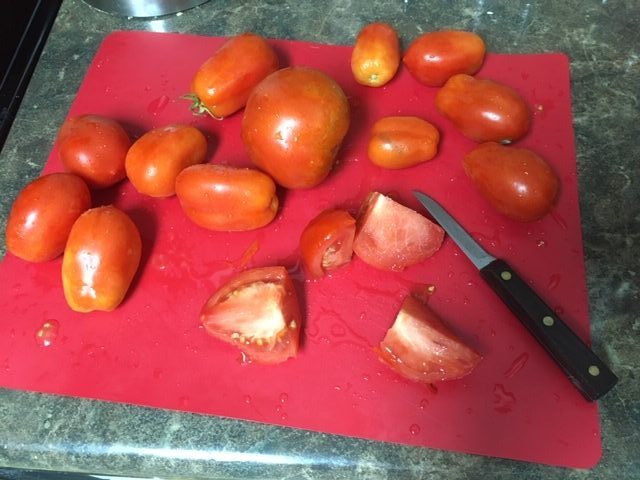
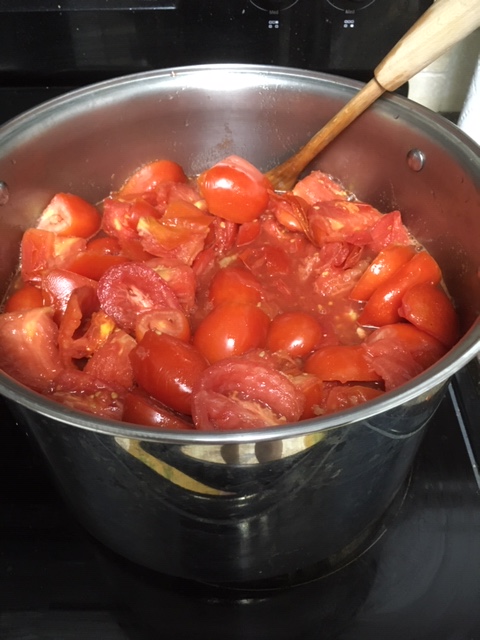
Wash the tomatoes and cut off the tops. Remove any bad spots. There’s no need to peel as step 3 will take care of that. Halve or quarter the tomatoes. Then add the cut pieces to the huge, very large pan, stirring every so often to keep the tomatoes from scorching. Bring them to a simmer to release the juices.
It’s okay to not have a huge, very large pan. You can can in batches using several pans.
I can remember on canning day, my Mom canning in batches. Every pan in the house was used, all the burners on the stove were heating up tomatoes. The kitchen filled with the scent of cooking tomatoes. All of us kids were lined up at the kitchen table juicing and filling jars as we processed in batches. To this day the smell of cooking tomatoes brings back all these wonderful memories!
Step 3 * Juice the tomatoes
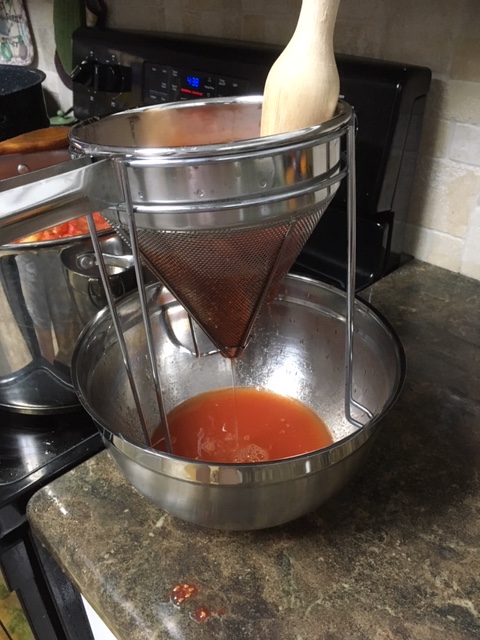
Once the tomatoes have come to a simmer, turn off the heat. Now comes my favorite part! Place the fine mesh sieve over a large bowl. Or fit it into a large mixing bowl, as I have to do, since I can find one that fits over the bowl. Carefully ladle the hot juice and tomatoes into a sieve. With a wooden pestle, squish the juice out! Round and round it goes, till the juice no longer flows! Love this part!! Scrape skins into a compost bucket.
Step 4 * Fill the Jars
Place the wide-mouth funnel over the jars. Carefully pour the hot juice into the jars, leaving one inch of head space for expansion. (Once you add the lemon juice the headspace should be 1/2 an inch.)
Step 5 * Prepare the Lids
Once you have enough jars filled for a batch, you can start preparing the lids. My canner will hold 8-pint jars at a time. Bring a large pan with about 1-2 inches of water in it to a boil. Boil lids for 5 minutes.
Step 6 * Add the Preservation Ingredients
While the lids are boiling, add 100% lemon juice. You do NOT want anything other than 100% lemon juice as it will not be acidic enough. (1 T for pt, 2 T for qt) and canning salt (1/2 t for pt, 1 t for qt).
If you don’t add enough lemon juice and/or don’t use canning salt, you will run into more spoilage and it may not be acidic enough to kill botulism-causing bacteria.
Spoilage TIP:
While botulism has no taste or smell, you can see spoilage by the color of the juice. NEVER SHAKE your jars before opening. This will allow you to examine the color. If there is any dark coloring, THROW IT OUT! Clean the jar thoroughly. If you shake it up, you will no longer be able to see the dark coloring.
Step 7 * Prepare the Jars
Wipe the rims of jars clean. This will allow for good contact with the lid to get a good seal. Using a magnetic lid lifter, place lids on jars. Add rings and tighten.
Step 8 * Process the Jars
After adding the jars to graniteware add water until the water is at least 3/4 the way up the jars or just below the ring. Bring to a boil and THEN place the lid on graniteware. To speed this along, I use my hot water pot and add boiling water to the graniteware.
Process in canner for the time required for your altitude and size of jars. My time is 35 minutes for pt jars, but yours may be longer depending on where you live.
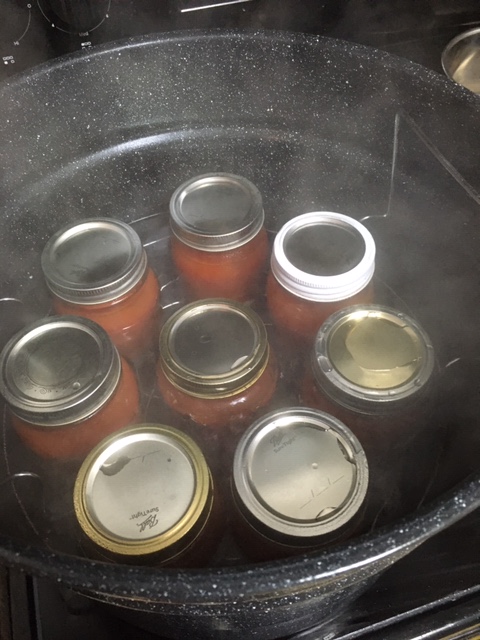
Step 9 * Carefully Remove the Jars
After the processing time is up, carefully lift the lid off, pointing it away from you to avoid getting a steam burn.
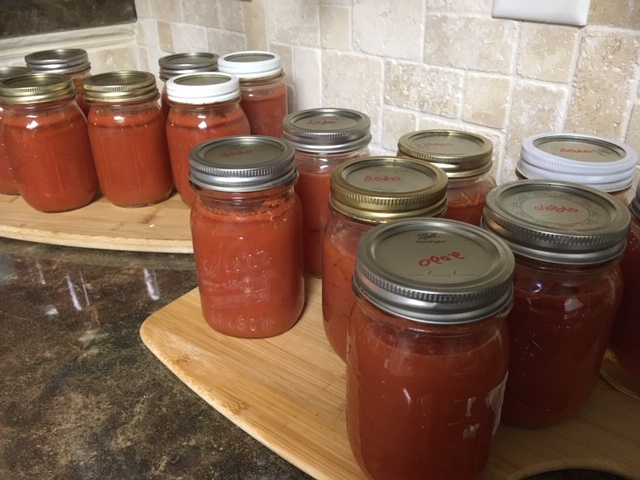
Carefully lift jars out using the jar lifter. Make sure you get a good grip on the jar before lifting. Set on a wooden cutting board to cool.
Step 10 * Listen Carefully
You want to hear “popping” sounds. This is the jar sealing. You are looking for the little button in the center of the lid to be flat. Once the jars are cool, label them with the year and contents.
Any jar that doesn’t seal, you can process it one more time. If the jar still doesn’t seal, once it’s cool, refrigerate and use it within a few days.

* How long does it Keep *
Jars will keep for 2 years. I don’t trust jars if they are more than 2 years old. I simply don’t want to risk it. You can also process crushed tomatoes and whole tomatoes the same way, making sure you remove any air bubbles from jars.
This is an easy way to have home-canned juice any time of the year for all your cooking needs!
* Frequently Asked Questions *
How do I use Tomato Juice?
Tomato juice will work in any soup that has a tomato base. Here are 3 of my favorites.
Tomato Soup
Hearty Soup with Lentils
Chili
Any recipe which calls for tomato juice such as meatball and gumbo recipes.
Why do you Need to Raise the pH?
There are 2 methods of canning: Water Bath and Pressure. How you know which method to use is based on how acidic the food is. The acidity level (pH) cut-off is 4.6. HIGH-acid foods have a pH value LOWER than 4.6 and can be processed by using the water bath method. LOW acid foods have a pH value HIGHER than 4.6 and MUST be processed by a pressure caner to kill botulism. You can use pH test strips to check acidity levels.
Tomatoes are right on the border of the 4.6 level. Some varieties have a higher pH and some varieties have a lower. You could test each batch of tomato juice to see its acidity level, but why add the extra step? By adding the proper amount of lemon juice you can be sure the pH is raised to safe levels for the water bath canning method.
Why Should I Use Canning Salt?
The Bottom Line: If you can get pickling salt, BUY IT.
SAFETY FIRST
Yes, you can use other kinds of salt, BUT there are some guidelines.
First, you can’t always just interchange the measurements of one salt for another. The grain size is usually different and if you measure tablespoon for tablespoon, you might actually be getting a different salt concentration than is intended in the recipe. As you probably know, in fermented canning recipes the salt concentration should NEVER be altered or you may not be safe. (The salt is there to prevent bad bacteria including botulism.) So unless you know the weight needed of the pickling salt and can weigh an equal amount of an alternative, you just might be altering the concentration…and that could be dangerous.
The one exception to this is kosher salt.
Kosher Salt: is commonly interchanged with pickling salt because most are also pure salt with no additives or anti-caking agents. (Note: A few brands of kosher salt DO have other ingredients, so always check the label if you want a clear brine. It should only say “salt” and nothing else.) And if you can find a “fine grain” kosher salt, all the better.
The Bottom Line:
The bottom line is that if you can get pickling salt, buy it! It is available anywhere that canning supplies are sold and is also available in cooking stores and even online. It is by far the best salt for canning as it helps prevent spoilage whereas another kind of salt can lead to spoilage. Remember, most recipes that use salt as an ingredient are proportioned for pickling salt.
What is Canning Salt?
Canning or pickling salt is salt that does NOT contain iodine. Iodine can lead to spoilage.
Why are there different processing times for different parts of the country?
In short: Altitude. Altitude affects how long you need to process in order to kill botulism. See Canning quick reference for an altitude adjustment chart for the proper caning times for your altitude. Don’t know your altitude go to the National Weather Service and type in your zip code.
Is Spoilage Different from Botulism?
Spoilage is different from botulism but it is still very serious. NEVER shake your jars before opening them so you can examine them for spoilage. Signs of spoilage are:
1. The container is leaking, bulging, or swollen.
2. The container looks damaged, cracked, or abnormal.
3. The container spurts liquid or foam when opened.
4. The food is discolored, moldy, or smells bad. (Just remember, you cannot see, taste, or smell botulism. So, if you doubt it is good, THROW IT OUT–Safety First!)
5. If any spoiled food spills, wipe up the spill using a solution of 1/4 cup bleach for each 2 cups of water.
What is Botulism?
Botulism is a medical emergency. If you or someone you know has symptoms of foodborne botulism, see your doctor or go to the emergency room immediately.
Botulism, Clostridium botulinum is found in soil. It can survive and grow, creating a toxin with incorrect canning. This toxin can affect the nerves, and cause paralysis and death. So, it is necessary to follow the correct guidelines laid out by the National Center for Home Food Preservation and Center for Disease Control and Prevention.
For More Information on Safe Food Preservation
Please see the How to preserve Food Safely page.
* More Canning Recipes *
Blackberry Jelly with demo video
Pickled Okra
Pickled Peppers
Cook What You Grow: Homemade Spaghetti Sauce
(Can crushed and whole tomatoes the same way as tomato juice. The only thing you do differently is to make sure all the air bubbles are removed. Not doing this can lead to spoilage or botulism as air bubbles don’t reach the correct temperature.)
* How to Freeze Your Harvest *
Green Beans
Berries
Black-Eyed Peas (Cowpeas)
Okra
Peppers
Potatoes
Tomatoes
Zucchini