
Garden Experiments 2020
by Elizabeth
May 2020
Experiment 1

For the past 3 years, I’ve used cardboard for my tomato field. I would dig my holes, place the cardboard, and then plant tomatoes. This worked great for keeping the weeds down, but it attracted snakes.
I would get the thrill of my life as I would remove the cardboard and find baby snakes. Thankfully, none were venomous. But I got tired of screaming. (Probably, my neighbors were tired of it too!)
This year, I’m trying just to have a cleared area free from weeds for my tomato field. No cardboard for snakes to hide under. I mulched the tomatoes with wood chips.
This worked out really well! My tomatoes are the healthiest they’ve looked in a few years. I have just a little weeding to do the bed, ever so often, but it is very manageable. And no snakes!
SUCCESS!
Experiment 2
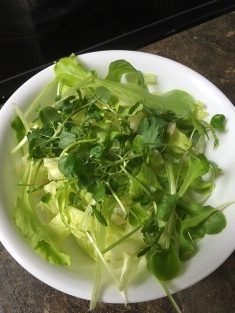
Second, try growing lettuce inside.
I long to have fresh lettuce year-round. So, this time I’m trying the overseeding method.
I’m trying several kinds of lettuce, and some kale and spinach too. Because why not give it a shot?
This experiment has been a success! The spinach didn’t do so well, but I expected that. It was AWESOME having fresh lettuce salads every few days. After a while, I even got enough lettuce for a small side salad without having to add any store-bought lettuce to it.
The only problem I had during the normal growing season (spring), if you can believe it…was aphids–IN THE HOUSE! CRAZY!!! Somehow they must have smelled the lettuce and made their way inside. I had to throw the radish, lettuce, and herbs out. Growing lettuce during the winter works better. In the winter when the insects are dormant.
SUCCESS!
Experiment 3
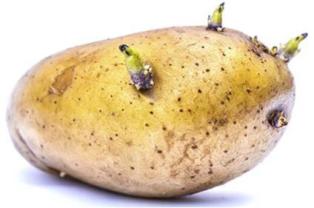
Has this ever happened to you? You buy potatoes. Forget about them. It’s suppertime and you need another side. You remember you have potatoes, but…they’ve sprouted.

Normally, I’d compost them. But, this time they sprouted during potato planting season. I thought, “Why not plant them?” They grew much more slowly than the red and yellow potatoes.
The plants looked beautiful! They were lush and green and got to be a good size. When they started dying back in July, I harvested them. There was one small potato about the size of my fist for each of my four plants, after four months of growth (they were planted in March)! I was so disappointed I just composted them. Won’t do this again.
FAIL!
Experiment 4
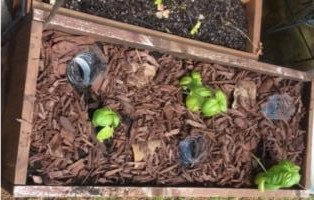
Planting in containers can be challenging. During the hot days of summer, they can dry out so quickly. Who hasn’t struggled with keeping plants in planters lush, green, and watered?
My herbs are in window boxes. Even with watering twice a day, sometimes it just wasn’t enough. So, I got some plastic water bottles.
With the lid on the bottle, take a thumb tack and punch holes in the lid. Cut off the bottom of the bottle with scissors.
After that, bury the bottle in the soil leaving about 1-2” of the bottle sticking above the soil. Fill with water. The water should slowly seep into the soil, keeping it moist. I am also trying some mulch.
My concern with trying these is, will they act like Venus flytraps…..extra fertilizer?
Thankfully, insects haven’t been a problem, but I did see birds drinking from them once. Didn’t expect that!
The reservoirs are working great! I no longer worry about my container plants burning up in the heat of the day! I water every morning, getting a good amount in the bottles and the plants. They stay moist throughout the day, even when we had that stretch of 90-degree days.
The only problem I’ve had with them is green algae growing in SOME of the bottles and the holes getting clogged. I may not have put enough holes in the lid since it is only some of the bottles. I just have to remember to empty those bottles after a good rainstorm to keep the algae away and rinse if there are any clogs!
I use water bottle reservoirs every year now!
SUCCESS!
Experiment 5
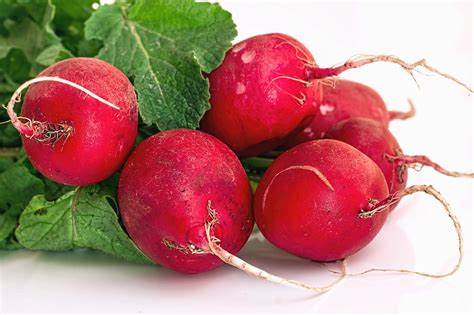
I like radishes. But, buying them from the store can be pricey, for small grocery budgets. I never seem to use them all before they go bad (which is both wasting food and money–2 things I really hate to do).
Radish is a cool weather crop. The planting window is small in Georgia. The spring planting time had already passed when I thought about planting them. While I’ve had some success growing it outdoors in the past, there are always so many I get burned out on radish quickly. Plus, with my small garden, there just isn’t room to grow everything I want to grow.
So I thought…
My lettuce seems to be doing great indoors, I have some old radish and green onion seed. I’ll try planting radishes and green onions indoors too.
I saved a plastic container in which some strawberries came in. It already has holes; perfect for watering. Cut the lid off. Pour the seed starting mix into the container and pre-moisten it in the container. It was a bit messier to mix it in the container, but I was being lazy.
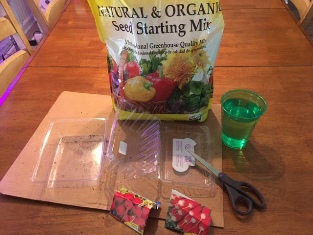
I planted one row of green onions. These will eventually be thinned to about 3 onions. But they grow so fast that even with harvesting the greens, this should be more than enough for one person. Then I planted one row of long icicle-type radishes. To have a longer harvest, a week later I planted another row, this time, round radishes.
Place the plastic container into a tray. Fill the tray about 1/3 full of water. After about 30 minutes, pour out any unabsorbed water. After planting, place under grow lights. With the small size of the container, I get 3 radishes per row, but for me, this is perfect. As I harvest radishes, I can keep planting them. This will keep me in supply without having too many at one time.
I got to enjoy ONE radish before they got infested by aphids, IN THE HOUSE! I will try again but in the winter. While the aphids didn’t bother the green onions at all, I did eventually move the onions outside. They thrived even in the heat of summer.
Onions–SUCCESS!
Radishes–FAIL…ish!
Experiment 6
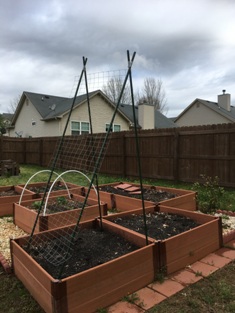
New Plants: Black-eyed peas (cowpeas), Asparagus Beans, and new varieties of tomatoes!
In case you couldn’t tell, I am not afraid of trying new things, at least in the garden. This year I’m trying several new plants. Black-eyed peas are so delicious. But they take some planning if you want them for supper. You have to soak the dried ones overnight and it takes me a while to save up enough bacon fat. (I fill little containers with bacon fat anytime I cook bacon and place them in the freezer.)
If I cooked black-eyed peas without flavoring them with bacon fat…I think I’d get booted out of the South.
The only problem I had with the black-eyed peas was an aphid infestation. But I have some plans for next year in how to deal with this!
I’ve never grown pole beans, but growing a 3-foot-long green bean sounded like fun! These just need a really tall trellis. I didn’t enjoy the flavor of these beans as much as the Contender bush beans I always grow. While I won’t do these again, they were fun to grow!
SUCCESS!
Experiment 7
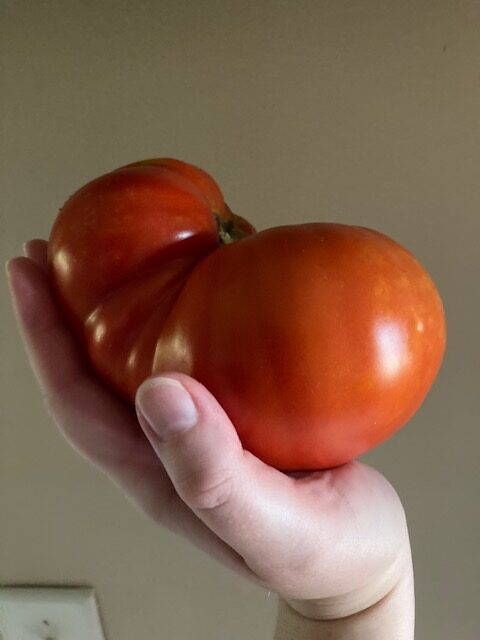
I’ve always grown the same tomatoes my Mom grew, except that one year. Big mistake, flavor-wise. Using different tomatoes to make juice, just didn’t taste like Mom’s cooking.
But, this year I wanted to try something different. I added 2 different varieties to my standard, must-have to make tomato juice taste right, tomatoes.
The porterhouse tomatoes were not only a huge beefsteak tomato, but the flavor was something out of this world! They made the best homemade pizza! I REALLY enjoyed the porterhouse tomatoes! These will have to become standard fare in my garden!
SUCCESS!
Experiment 8
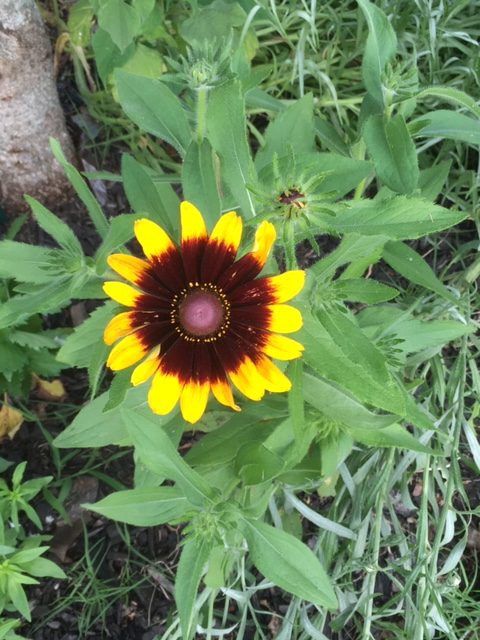
What would a garden be without some new herbs and flowers?
I’m trying watercress. Why, because–YUM! It’s doing amazing! It adds a wonderful crunch to salads and burgers.
I’m also trying Aster and Snapdragon and a few others in the daisy family all of which I grew from seed. The daisies weren’t the plan, but with the shelter-in-place orders, I couldn’t leave my house to plant them in the Library flower bed. So, instead of letting them die, they ended up in my flower garden. Lucky me!
SUCCESS!
Experiment 9
Growing a Cucumber in a Pot
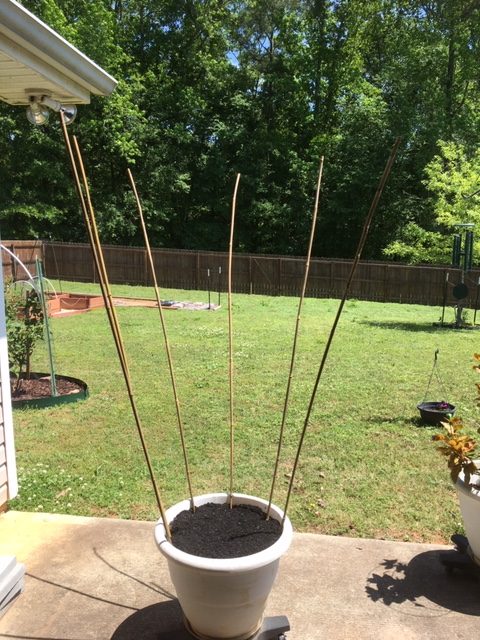
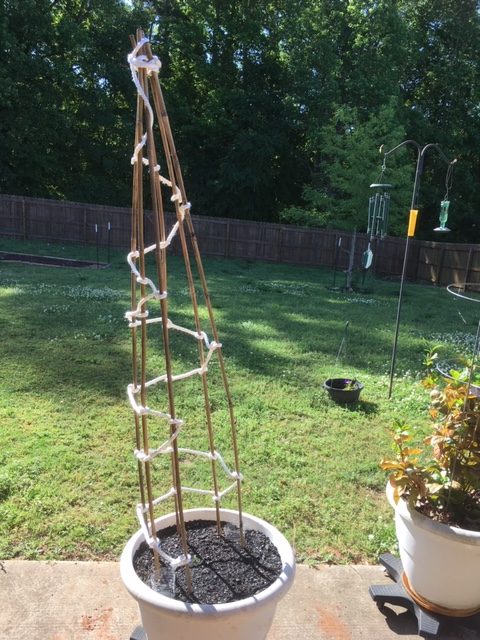
This was a last minute decision for me. I read that you can grow cucumbers in a large container with a trellis. So, I thought why not try it? You need a LARGE container. Mine will hold 2 cubic feet of dirt. I made a smaller and simpler trellis than the one I made for the asparagus beans.
I took 6, six-foot bamboo poles and wound about 10 feet of rope around the poles to make a teepee trellis.
Fill the pot with the garden soil. Place poles in the pot, pressing down to give a good base. Tie the poles together and then wind the rope around the poles.
Plant 3-4 cucumber seeds to a depth of 1 inch. Water in. Thin to the strongest plant. The pot will only be able to support one plant. Any more and they probably won’t be healthy.
From my experience last year, I also planted some marigolds in the pot too.
Last year my patio plants didn’t produce any fruit because they weren’t pollinated. Some nice flowers should attract some pollinators so the cucumbers should produce fruit.
The flowers did their job and I got beautiful cucumbers! This is another must-do again and again!
SUCCESS!
Like most gardeners, I keep trying new experiments throughout the growing season. Keep checking back for more experiments and updates on current projects!